Week 8-Drawing Feet and Hands
Here are some tutorials on drawing feet:
http://thevirtualinstructor.com/how-to-draw-hands.html
http://thevirtualinstructor.com/how-to-draw-hands.html
https://www.youtube.com/watch?v=YU8mkmdUU7E
https://www.youtube.com/watch?v=vlJg8WwY3YU
https://www.youtube.com/watch?v=u1RMZX989yk


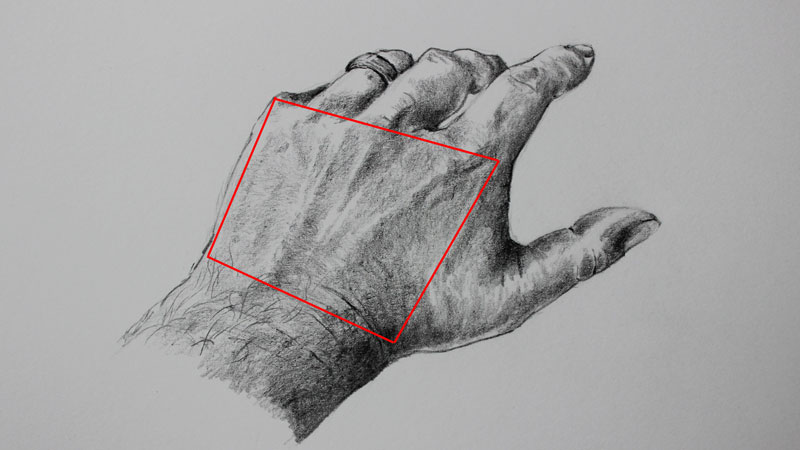
Shapes that Make up the Hand
Look at your own hand. If you look at the basic shape of the palm, you'll notice that it makes the shape of a square. This square can change a bit when the hand is in a different position, but it's still there. You can almost think of the the square that makes up the palm as sheet of paper. A sheet of paper is rectangular in shape but it can be bent and can appear curved at certain angles.
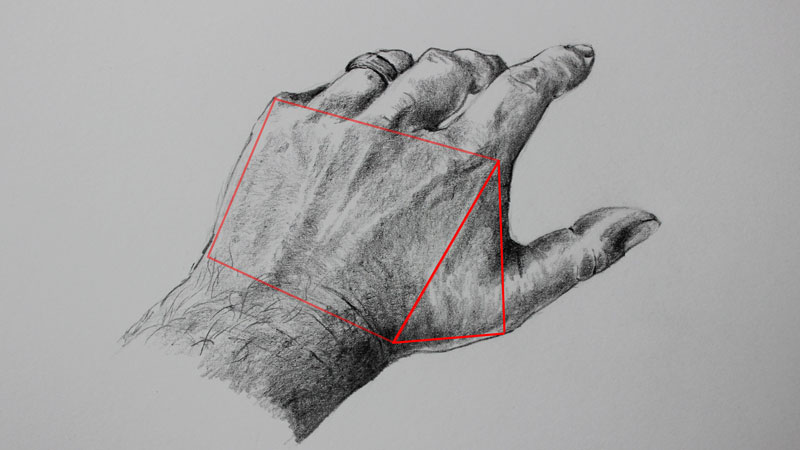
The shape that is created where the palm meets the thumb of the hand is a triangle. Here again, this triangle shape can change a bit when viewed from different angles, but it's still there. You just have to know to look for that shape.
Then it's on to the fingers. The shape of a finger is simply a cylinder. The main fingers are made up of three small cylinders, while the thumb will only have two. Depending on the angle, the cylinders of the fingers may overlap, covering some of them from view. The cylinders may also taper or become larger depending if any foreshortening is involved.
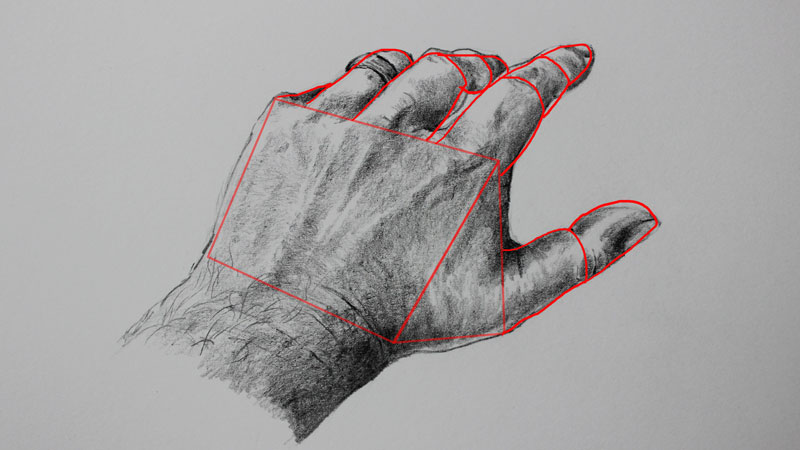
Remember, by changing the angle of the hand, the shapes may change a little- but they're still there. You need only to train your eye to find the shapes that make up the structure of the hand. Fortunately, these shapes are easy to draw.
After you've drawn the shapes, draw the contour lines. Use the shapes as a guide. (Make sure your proportions are correct.) Once the shapes are there on the surface, drawing the outlines is a lot easier. This allows you to concentrate on the lines that you add to the drawing. Be sure to draw the lines with consideration to line quality. Add variety to your line and push the illusion of form through the marks that you make.
Typically areas where the hand becomes larger will require thicker lines. Areas of shadow will also need thicker lines. Some areas may receive a very thin line, or maybe no line at all.
Create the Illusion of a Light Source
We see objects and make sense of the world around us based on the light. It is the light that informs us of the form of the objects that we see. Every drawing needs to have a defined light source. We can create the illusion of light through our use of value, or the darkness or lightness of a color.
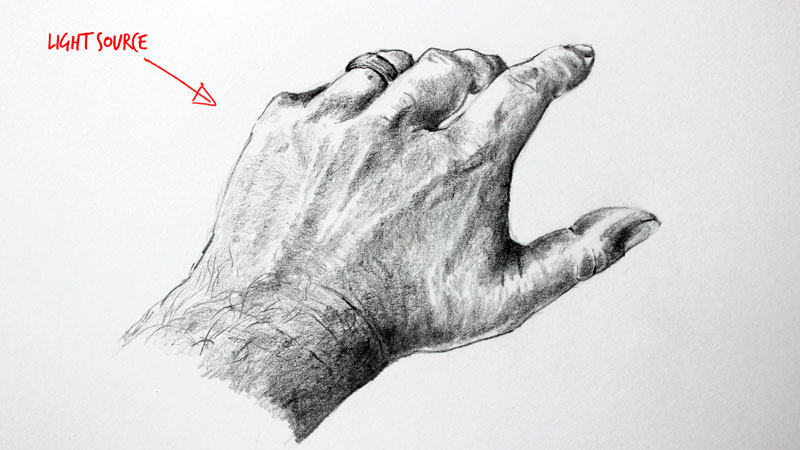
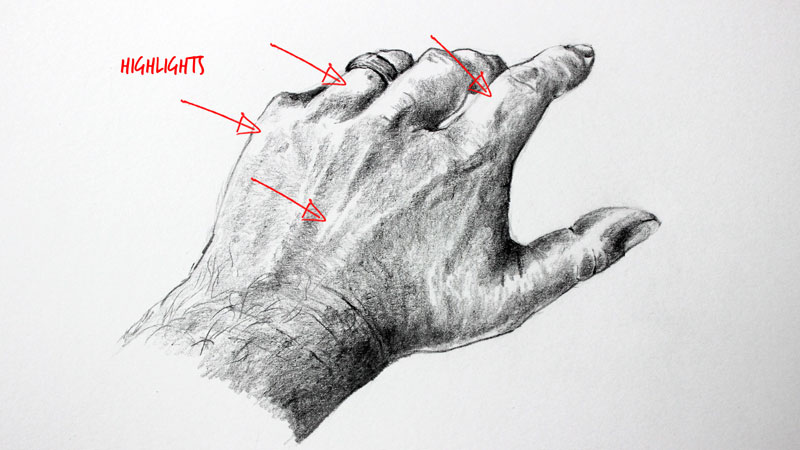
The light source is defined by factors that are related to value. On the side of the hand that receives the light source, we will see highlights which are communicated by tints (light values). Areas that protrude will likely be areas of highlight.
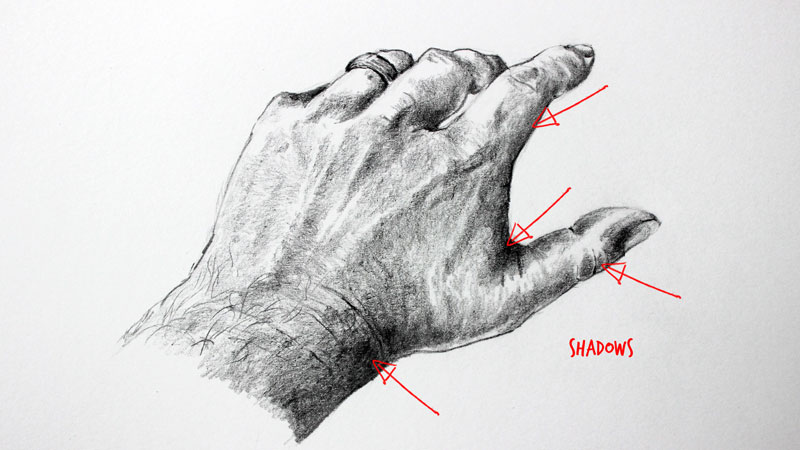
On the opposite side of the light source, we will see shadows. These areas will be communicated through darker values. Areas that recede will likely be areas of shadow.
Make sure to include a full range a value when you draw hands. Remember, it is the value that tells the viewer about the form of the hand.
Nothing drives me crazier than to see a student draw a figure and hide the hands! There's no need for that! It's not hard to draw hands! For more video instruction on drawing hands check this out-> Drawing Hands


Homework due: March 10,2016
1. Create one new character for Foster's Home of Imaginary Friends.
2.Create one new character for a cartoon of your choosing.
Please place character in a scene that corresponds to your character.
3. 5 hand drawings.
Have them ready. We will view your work in class.
Use this naming convention when placing assignments in Dropbox.
SANTALO_DIG1111_YOURLASTNAME_W1
UPPERCASE
No comments:
Post a Comment